25 April 2012

Return from the Mysterious Island…

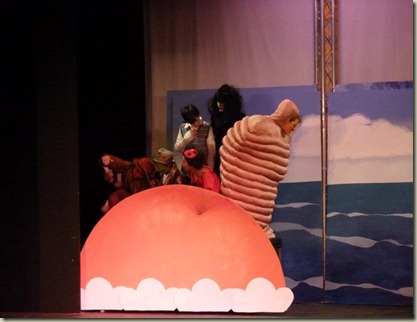
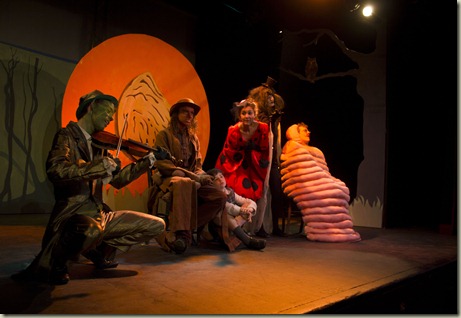
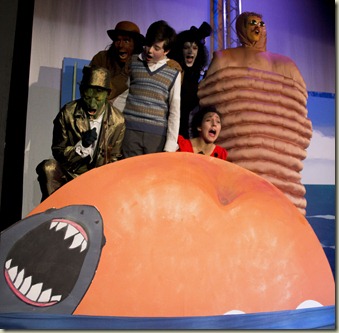
... where 50 foot insects have been taking over the world! Well not quite 50 foot. Nor the world, but you know, they were pretty big. And they did travel from England to New York aboard a giant peach...
IMG_4682
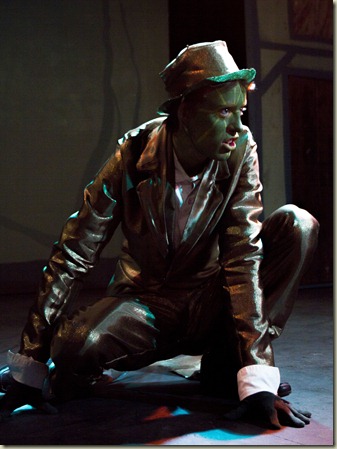
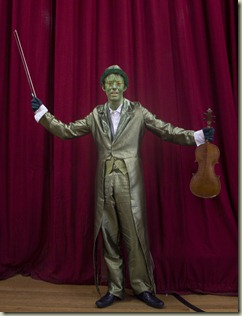
Meet Grasshopper:

IMG_4777
        IMG_4893     IMG_4897
         IMG_4895  IMG_4902
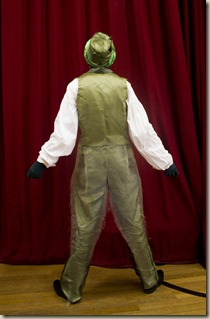
Although a little hard to tell from the photos, the tail-coat and trouser fabric is a most luscious deep grass green with gold metallic thread running through it (read: hell on earth to sew clothes from). Inside it is a gorgeous deep green satin, speckled with gold. It looks beautiful but the short metallic threads were all that were holding it together, snag one and it literally disintegrated.  This meant that every cut edge had to be fray-checked, every seam had to be reinforced both sides before sewing (because the needle punctures caused fraying – I used strips of bias taffeta tape), and every inside edge had to be properly finished to protect raw edges.  This was a labour of love, but one that I enjoyed greatly (I later surmised this was due to inhaling Fray Check fumes while pressing seams). [The fabric is from Saeeds in Wathamstow]

The tail-coat is based on an OOP McCalls costume pattern, I made some minor modifications, and extended and reshaped the tails and used the satin side of the fabric for the collar facings. The most significant change to the pattern was to raise the armholes so that the actor could lift and move his arms about without the rest of the jacket following. I blame the demise of the man-servant for this modern sloppiness in fit – high armholes do make it tricky to get the jacket on, but it conforms to the body so much better, I don’t know why but I had Fred Astaire on my mind, much of the time I was redrafting this. This modification meant I also had to redraft the two-part sleeve which I worried about constantly until the point I set the sleeve – straight in, no easing required, perfect fit, first time. I was so incredibly delighted, I think I had a smug cat look on my face for a good hour or so afterwards!

The trousers are based on Victorian evening dress, drafted from The Victorian Tailor.  Because of the amount of leg-bending/hopping and the frailty of the fabric, I decided to add some extra ease throughout the legs (the actor appears to have sprung legs, I worried he was going to bring the lamps down from the grid with some of his hops!). 

The waistcoat, in a gorgeous yellow-green taffeta (which I used also to make bias tape), is from a modified 1940s pattern and overlaid on the back with a pale green sparkling organza to give the grasshopper those ethereal wings. The back of the waistcoat is my favourite part of the whole outfit, I wish I could capture just how amazingly pretty that organza looks over the taffeta. All three fabric were in the same tones of green and just blended perfectly.

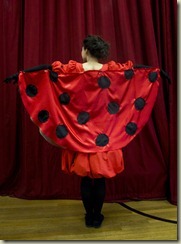
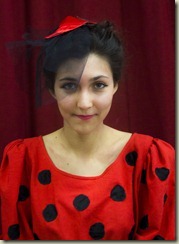
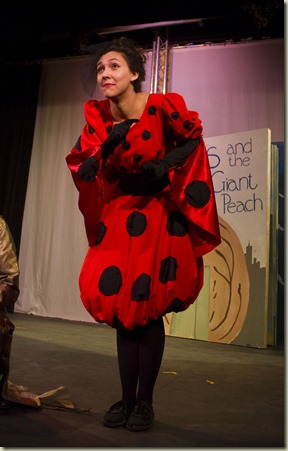
Meet Ladybird
IMG_4713
IMG_4904IMG_4905IMG_4906   
                     IMG_4908IMG_4909
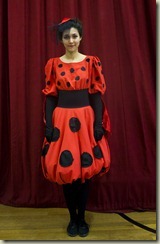
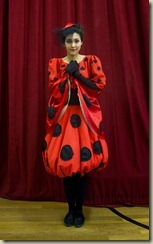
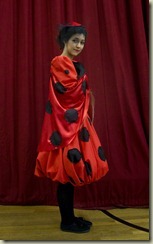
The young designer I was mentoring throughout this project had a very clear idea in her head about ladybird, right from the start. Time was not our friend on this project, so some compromises had to be made (as often is the case) but the result is still very much akin to her original concept.  My only contributions to this were the suggestion of the lacy scalp-cap, organza underlay to her shell (her wings) and a tweak to the sleeves, the hard work lay entirely with the young designer.


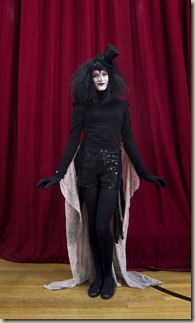
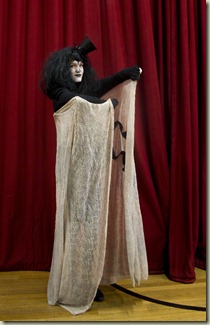
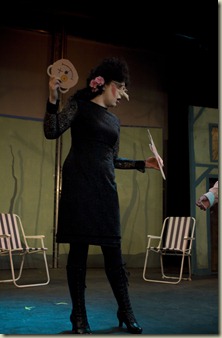
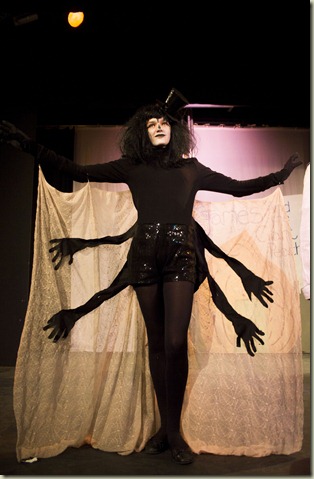
Meet Miss Spider
IMG_4718
                    IMG_4883IMG_4885
The director was quite clear what she wanted her sexy spider to look like, so she was fairly straightforward to put together, the extra limbs took up much of the discussion. And even after we had finished, we were still discussing those limbs – should there have been a extra pair or do you count the legs, opinion was divided!  I think you can just make out the cobweb pattern on her lace cloak, it should have been silver, but we could just not get the colour to take, its back to the drawing board on that one! There’s a few areas to improve upon, I think. Her false limbs will probably be replaced with lightly stuffed gloves to give her some extra dimension and there is a lot of black sparkle waiting to go on her torso, we couldn’t make our minds up about that at the time.

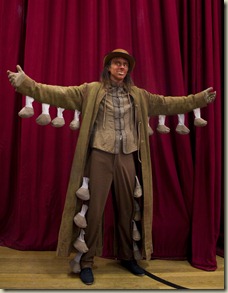
Meet Centipede
IMG_4719
                    IMG_4888IMG_4890  

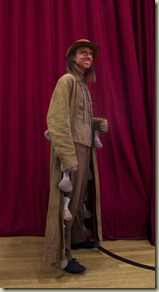
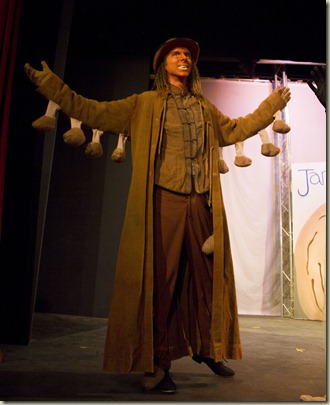
Oh what a fun character this one is, and again difficult to design because there are so many ways to go about it adding all those extra legs!  A trawl through the internet for inspiration brought about many suggestions but in the end I went with the idea that had been in the back of my head from the start – and that is a lot of baby booties, dyed and stuffed!

The high-waisted trousers are in a rather lovely linen I picked up in Walthamstow Market and also based on a Victorian pattern, drafted from the aforementioned book. While full of inspiration, this is not the most straightforward of books to draft from. In this case I was drafting from a small diagram, without a grid aid and without a clear line drawing of the final trouser (the only reference picture shows them under a closed frock coat) so I had to work off memory of how the waistband should look and fit.  I was going to attach a waistband (and that would have made life much easier) but the actor was a slender chap and I decided a grown-on waistband would work much better.  I had a diagram to show a grown-on waistband in situ but no plotting points or measurements, it was entirely guesstimation.  As much as I love The Victorian Tailor for reference, you are left on your own when it comes to drafting/making waistband syles, stays, lining, installing flies, finishing trouser hems, etc. This isn’t the author’s fault, he is reproducing period instructions and they wouldn’t have covered this because the tailor would have this knowledge already, but I could only complete these patterns because I have already seen Victorian trousers before and know the details. An extra chapter covering this would have been perfect. (The instructions that are included on making up the trousers, left me puzzling for days what “dress” is and why it needs accounting for! I can fully appreciate what artisans tailors were and indeed, still are!)

Originally, I had suggested a frock coat to complete the ensemble, and had a lovely rust striped wool for it (which has since become a blanket!) but neither young designer or I were convinced on this idea.  I pulled from stock this wonderful long jacket, a purchase from an RSC sale and teamed it with a frogged waistcoat which had a lovely mottled texture . The coat is on loan at the moment, so I’ll be reproducing it to give the Centipede costume a permanent jacket. It certainly helped no end with his roguish attitude. 

You can see his extra legs run up the sides of his trousers and along his arms. Interestingly, the “100 % cotton” booties did not take the cold dye well at all, especially the insides which is the side I wanted to use (instead he ended up with tiny stars and heart grips on his boots, hehe), I’ll have to see if they take better with machine dye. He’s also wearing tap shoes so he made a lovely clicking sound as he moved about.

IMG_4645

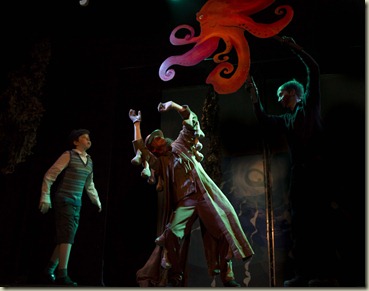
Centipede has a little overboard mishap, encounters a giant Octopus and is saved by James, hurrah!

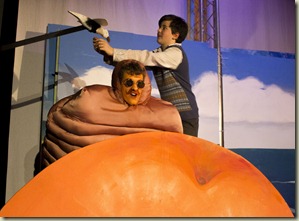
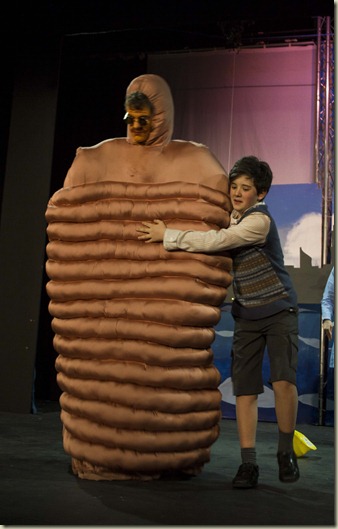
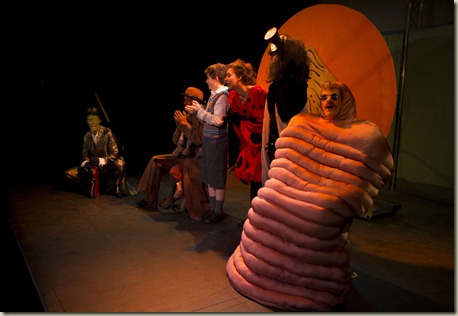
Meet Earthworm
IMG_4612

 IMG_4668IMG_4550
525812_171494419639073_100003355494868_238479_1279001043_n
            IMG_4880IMG_4881
By far my favourite character, I always love the cynical pessimist, Hoggle, Marvin the Paranoid Android, Statler and Waldorf, Earthworm… “They’ll eat me first because I’m fat and juicy and I’ve… got… no… bones…. wahhhhhh!”
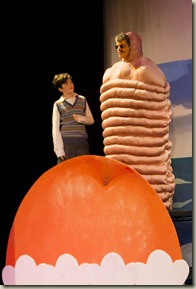
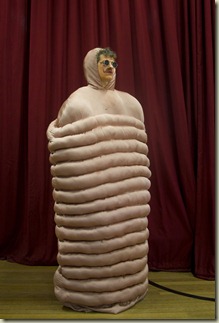
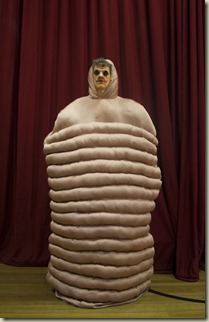
This was an amazing costume to design and make. Again, we were drawing blanks on this character, how far to humanise him, should he have limbs, how to facilitate his wriggling motion… in the end the inspiration came from finding the perfect worm coloured satin jersey (a dusky peach) and lining fabric. We had already discussed a hooded cloak and maybe painted lines, and at discovering this lovely fabric, I thought “stuff it!” Literally. 

So he is basically two layer of fabric zig-zagged stitched together.  Marking the lines was a real headache, chalk just wouldn’t make neat lines, and in the end I used masking tape. His initial outing was unstuffed as the ziz-zag sections created some lovely ripply lines on him but he didn’t look juicy enough so I spent several hours stuffing his ribs and I love the overall look (although I managed to miss his bottom rib on his back and didn’t get the time to fix that).

Sewing up his lining and hems was the most comfortable job ever as I lay on the worm, he is basically a costume, sleeping bag and mattress in one – be perfect for fancy dress sleepovers! And it looks hilarious when its lying on the floor, the stuffing makes it look like there is still an actor inside, having a nap! Inside he has a hand-hold system that allows him to lift and lower the costume (it crumples rather well and the actor could kneel and sit in it comfortably) as well as hidden pockets.

He is the least anthropomorphic of the insects, but with his gaucho moustache, frown lines and wriggle, I think he was the biggest hit with the audience, always came on to fits of laughter and applause! The actor did was hilarious too, and beautifully emphasised Earthworm’s blindness, I couldn’t stop giggling when he’d launch into an argument with another insect while angrily staring them down – only they’d be on the other side of him! I really want to make another one now – reversible – a blue Absolom caterpillar on one side and a glo-worm on the other!
IMG_4855
IMG_4851
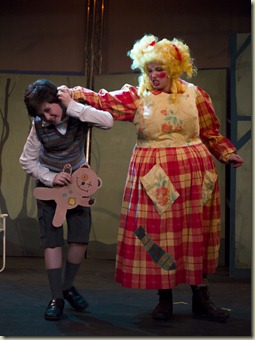
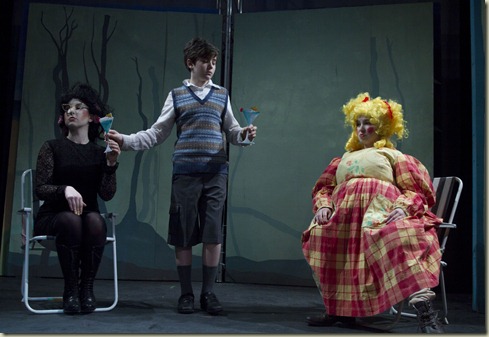
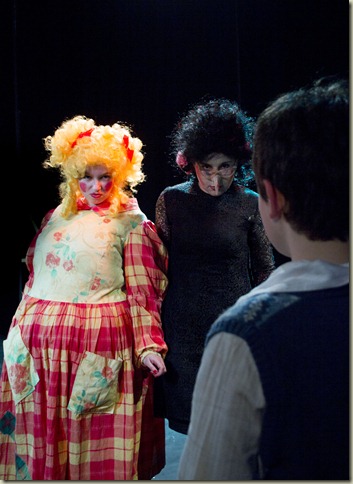
And what’s a good children’s story without a pair of nasty old aunts?!
IMG_4772
IMG_4748 IMG_4753
IMG_4760
A Young Theatre production
Costume Design: Kate Holland and Xye Appleton
Scenic Artist Dana KidsonPhotographer: Josh Martin
Costumes available to hire, please contact me for details.

11 February 2012

2012 - The Year of Greatness

2012 is going to be a big year for the world, and for so many reasons...

In particular the UK will have eyes from across the globe focusing on it as host of the 2012 Olympics. Where I live in East London, we have been upheaved by all the preparations, its exciting and frustrating all at the same time. The road closures, the building works, the chaos on the one hand but then the town centre has improved no end for its new traders, bars, restaurants and Westfield Mall. I'm no shopper but I really enjoy wondering through the mall, it has a very American feel, reminding me of happy trips abroad, and yet it is very multi-cultural with its food courts and shops from around the world. And so clean. It's sparkling new and bright and clean, so refreshing in London!

2012 also sees the return of the V-Day Festival returning to London, a celebration of women around the world centering around the Eve Ensler collections of The Vagina Monolgues and A Memory, A Monologue, A Rant and A Prayer. The byline for the festival is more hard-hitting with a clear message that should not fail to make any woman (or man) stop and think: "Until the Violence Stops".  I was very privileged to work on V-Day in 2010, when we were raising funds for the City of Joy in the Congo Republic.  City of Joy is not a refuge for battered, raped and mutilated women, it is a home where they receive security, medical attention, education, access to the world through phone and internet and most importantly love and friendship which empowers them to overcome their experiences and reclaim their futures for themselves.  You can find out more about the City of Joy here, the global V-Day campaign here and about the fab entertainment line-up for London's 2012 V-Day Festival here (and you may just spot a slightly over-wired me holding a much smaller Mango in the archives!).


And I have branded 2012 as a Year of Greatness for me personally too.  A year when I open my wings and soar, following on from a few false starts.  Becoming a parent in 2009 really put a kibosh on my career as a theatre wardrobe mistress. It was no longer an option to spend 60 to 90 hours a week in dank theatre backstage areas, working late into the night 6 days a week. But it brought me a new dawn in which to look at the world.  I love the daily adventures of my daughter, the things we adults take for granted seen as a milestone breakthrough, something to be celebrated.  In the snow this week, we stomped around, comparing footprints and making shapes with our feet, I had forgotten how much fun the snow could be. My two-year old is teaching me a lot.

And she is inspiring, Molly and Mango would not exist without her.  All along, Molly and Mango was intended to be something else too, it was the start of a new direction, one that brought together my love for sewing, making, creativity, vintage aesthetics and my daughter.  All along Molly and Mango was the seed for something I would never have even considered before my daughter arrived in my world.

2012 will be the year I finally launch the Molly and Mango - Vintage Styled Clothing Range.  I've been preparing for this for over two years, I had hoped to launch before now but parenthood, well I'm sure any parent will tell you its a full-time job on its own.  So the project has crept along, ever on my mind, snatches of preparation time taken here and there in between kitchen runs for food, snacks, milk, water, juice, tea (for me), bathroom runs for nappy changes, baths, hand-washing and bedroom runs for toys, books, changes of clothes, and of course play sessions, song sessions, music sessions, cuddling up on sofa watching tv sessions, laundry and tidying up the chaos that a toddzilla wreaks (aka the "baby bomb")....

The initial ranges will be for children - boys and girls from birth to 6 years.  I hope to later add adults clothes into the mix and if there is a market, older children. I have so many exciting design ideas and cute touches in mind, I ache to get them out, now I am nearing that with the first items for sale online by late spring.

This new direction doesn't mean I will be abandoning my old career entirely, I have found new ways to move forward with that, ways that build and expand on what I do in costume design without taking me too far from home or my passion for costume making.

2012 will also be a Year of Greatness for Mango too, she is starting nursery very shortly. She will be setting out into the world, ready for new adventures and explorations. She will make new friends, learn and develop new knowledge and skills that I have not imbued in her, she will start to learn about independence, social interaction, how to get along with others and the rules of negotiation... its so scary and so exciting all at the same time...

Yup, 2012 is going to be busy... and great!

11 January 2012

New Year Re-sew-lutions

I should avoid making resolutions, I tell myself.  They only lead to a feeling of letting one-self down.  But then, I thought, they are also a way of reaffirming our goals.  Considering what is important to us, what we would like to change, where we would like to be when the next year ends.  In which case their success relies entirely on our own determination of what is realistic and what is unlikely to happen...

I didn't resolve to do much with 2011, a quick check back and I see my intentions were:
* To declutter
* To organise my time better - specifically with my blogging:blog reading:sewing ratio. 

Well, I did declutter.  Then I recluttered.  A lot. So in fact I am probably starting off this year with more clutter than last year began.  But amidst that clutter I found the space to put furniture in to hold the clutter.  Railings.  I need to put up my railings that have been waiting since September, so the vast majority of my clutter will vanish into wardrobes and free up shelving space currently occupied by my wardrobe. To do that I have to declutter the understairs cupboard in order to reach the masonry drill buried deep inside.  To achieve that I need to remove my fabric stash to its awaiting new home. That requires bolt boards though. Bolt boards which are marked up on posterboard awaiting a trip to a bandsaw (hack saw failed to make an impression). So when my bolt boards are made, I can rehome my stash, clear the understairs cupboard ( a combination of overflowing stash and items which can be stored on the the shelves that will become free when my stash is moved), acquire the drill, hang my rails, hang my wardrobe and refill with my shelves... What a sequence of events, I feel a gantt chart coming on! Resewlution #1 - I must get those bolt boards cut. 


The ratio... hmm well it did change.  I did spend more time sewing - and critically more time sewing for me and Mango as opposed to just work. I spent a lot less time reading blogs. That's quite sad because much of my motivation and learning comes from reading other people's blogs.  A perusal of We Sew Retro has me wanting to rush to my sewing machine to whip up a 1950s house-dress. I get as far as the kettle. But the spirit is willing! Blog writing time was shocking though. 18 posts in 12 months. Compared to 35 posts the previous 5 months. Appalling.  I want to be a regular blogger, I want to share the innermost workings of a sewing mind, the frustrations, the joys, my knowledge with the world. I want my followers to actually have something to read and to encourage more people to follow my mad warblings. I admire greatly my blogging heroes who seem to have the perfect balance of work, sewing and blogging and aspire to be more like them.  Then something dawned on me last night.  Almost all of my favourite (sewing) blogs are written by women of around my own age. And I don't think any of them have children.  Therein, I think I may have found my stumbling block.... Resewlution #2 - I shall stop beating myself up over not having their superb blogging prowess and amazing time organisation skills and wardrobes full of me-made attire... and put it in my arsenal for that day when the 16 year old Mango is shouting at me "Its not fair!" and I will retort "No its not. Its not fair I had to sacrifice a promising blogging career and wardrobe of unique, hand-crafted designs for you. So no, you are not going to a that all-night party with that boy this Saturday!" (Is it naive to hope she'll be too pre-occupied sat on the sofa with her old ma, knitting her own wardrobe?!)

2012 Resewlutions
Well I made two.

1. First is to do with UFOs - not the little-green-man kind but the secret shame of seamstresses across the world - the UnFinished Object.  I have a lot of those.  I have one that hangs in my sewing room and mocks me almost daily.  My nemesis. I blogged about it once, couldn't bring myself to finish the post. Much like the article itself.  I will though. I quite often think, I'm going to go tackle that UFO. I get as far as the kettle. Anyway my resewlution is not to tackle the UFO pile, I think that would be laughable.  But it is not to add to it.  I start a project, I finish it.  I was trying to be really hard and add "before I start the next one" (obviously this is only applying to personal projects, I have to stop to sew for work). I might have to be flexible enough to allow myself to do something else if I have hit a rut with my current project that requires that little bit of time out, a rethink and a recharge of motivation.  Otherwise a whole lot of sewing might not get done because of that one damned seam problem...

2. Pre-shrink my fabric when I buy it.  It sounds so simple and maybe unneccessary. But here's the scenario: You've just received through the post a stunning pattern - or you've been flicking through your two hundred odd sewing patterns for viewing pleasure one evening (y'all do this too, right?) and you spot this gorgeous number you have been wanting to make up for ages.  You've got the pattern, you've got the charge, heck you've even got the notions in your stash, you rush to the sewing room and pull out the perfect fabric, its all systems go! But wait! Have you preshrunk that fabric? The countdown clock starts: Did I pre-shrink it? Tick Tock.  I don't think I did. Tick Tock. No, I definitely didn't. Tick Tock.  I really should pre-shrink it, its a first rule of sewing. Tick Tock. I tell all my students they must preshrink their fabric first... Tick Tock. But if I do that it won't be ready to use before tomorrow. Tick Tock. And I probably won't have this all this motivation then. Tick Tock. How much will it really shrink, first time I wash the garment? Tick Tock. Remember that time when that dress shrunk by four inches in the first wash? Tick Tock. Sew now or wash and sew tomorrow (if I still feel in the mood)? Da da da da, dadadada dooosh. Darn it, where's the laundry powder?

And what happens? I wash it, I dry it, I analyse the shrinkage for the justification of the act. Then I fold it up and leave it on the side-table for a week. Or longer.  Now if only I had pre-shrunk that fabric when I brought it home, I would have another moment of inspiration hanging in my wardrobe on my shelf awaiting hanging rails with the rest of my wardrobe! I must get those bolt boards cut....

8 December 2011

Where did Autumn Go?

So its been some time since I was last here... and on many other of my favourite blogs - its taken several cups of tea to catch up over at the new home of Sew Retro.  There's been a lot going on and not much of it has been sewing!  I'm well and truly into youth theatre panto season but this year, I'm joining the sideline with costume and have taken on role of co-writer, director and choreographer.

But you can take the sewer away from the sewing but not the sewing away form the sewer, I'll be dabbling in costume and there will be pictures... my fairies for example are costumed in chiffon gowns from a vintage 60's night-dress pattern, the heroine of the show will be resplendent in a mock-tudor gown based on a 1980s prom dress pattern...  My personal costume challenge came from taking the designer's ideas and creating patterns simple enough that the group can produce them with little expertise, time and budget.  Its required a lot of planning and creative thinking, but very interesting sourcing patterns that the team can adapt and giving 20 minute lessons in how to produce certain style features or garments!  I look forward to sharing it all in the new year! Seasons Greetings to you all!

31 August 2011

Even More Mango Spoils...

Another pair of dungarees!


From Simplicity 7782 This time I made View 5, the difference being elasticated ankle cuffs.  The fabric is floral corduroy on a lemon marl background and was purchased from Goldhawk Road.  It is faced with dark cream cotton.


For this version, I added complimenting piping along the yoke edges front and back. The piping is made from 15mm satin ribbon - rather tricky to do but worth the effort!  I used the same shade of green as the ribbon in the top-stitching details along the centre front and back seams and side seams (below).  I also omitted the buttons. My machine doesn't do buttonholes very well and I had a play with doing bound buttonholes using the same ribbon as the piping but it was way too tricky with the narrow width. So I opted for snaps as an experiment. 


With the exception of where the facing joins the outer garment, I used flat-felled seams (centre front and back, side outside and inside seams, and where yoke joins main body).  These dungarees were started in July and only got finished today because I got a bit frustrated with the side seams.  When I picked them up again yesterday I was horrified at the sewing of the first side flat-felled hem. I think the worst sewing I have ever done, so bad I questioned whether it was me who had done it!  Needless to say, it was unpicked and resewn.

I use this seam finish a lot in children's clothes and costumes so I am used to it. However this was the first time I've used it on children's dungarees and I realised that it very tricky getting these narrow tunnels of fabric flat on the sewing machine bed.  I ordered a pair of flat-fell feet for my machine (shown above), hoping that they may provide a magical answer!  The feet arrived last week and I used the wider one (6.5mm)  for this task.  It was rather awkward to get right to begin with, I think I almost have the hang of it now. In any case it allowed me to complete all my flat-fell seams.  I also found it helped to use the free arm and gather the sewn trouser leg along it as I sewed. (The sewn fabric goes straight out of the back of the foot but then skews to the right to gather on the free-arm). I noticed that my seams are a lot flatter with the foot, it kinda wins me over on that benefit alone.

The elasticated cuffs and top-stitching on side seams.  The hem is folded twice so I can let it down as Miss Mango grows.  The pattern uses casing but the double hem is sufficient to do the same task for now.  All I have to do now is persude Miss Mango to try them on. She is getting very particular about what she wears and the last pair of dungarees remain a firm no.  Sometimes even if she screams while I dress her she is okay after the clothing is on. With those dungarees, no way, she's trying to peel them off again.  Kick in the teeth, much!

28 August 2011

More Mango’s Spoils!

I continue with my mission to bulk up the wee girl’s wardrobe with ample prettiness.  This blog brings you more needlecord and some sugary sweet floral action. And a lot of pink. Quite frankly a deluge of pink!

DSCF3510

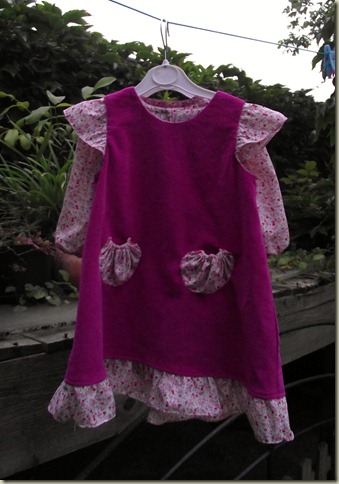
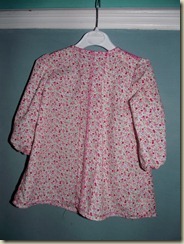
Here’s the pattern:  Its a simple long-sleeved A-line dress and a pinafore dress (with or without ruffle trims) and worn either together or separate.  Its aged 18 months, madam is 24 months so out came the grading ruler and greaseproof paper and I graded it up (and as she’s “small” for her age that means ample growing room!).

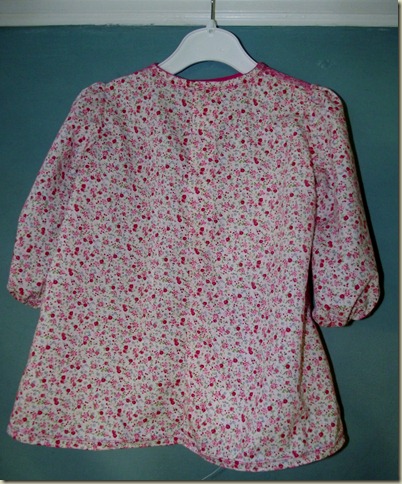
I made both views to complement each other, but also to be worn separately.  I chose to make the dress a tunic length blouse instead so she could wear it over jeans. Especially since most of summer has gone now! My mother made me a whole collection of simple frocks in different colour floral fabrics when I was a tot, so it gives me some nostalgia to do the same for my daughter!

DSCF3443 

DSCF3446  DSCF3459

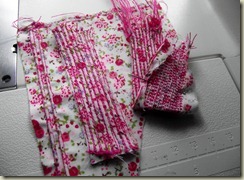
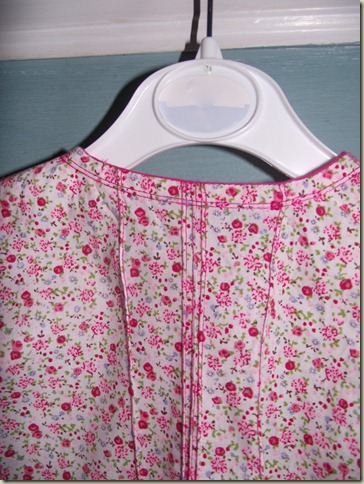
I’m trying to add a little embellishment of different types to each project (oil those rusty techniques!) and for the blouse I chose twin-needle top-stitching and pintucks, a favourite of mine, especially for children’s clothes.

DSCF3497

L-R:  Defined pintucks (sewn over fine cord) – Narrow stitching using twin needle and pintuck foot as guide over double layer of fabric – Semi-defined pintucks using just foot & twin needle and some tension in single layer fabric.

I used my 7 groove pintuck foot and 2.0mm twin needle. The center front pintucks of the blouse are stitched two groves apart over embroidery thread to add definition and texture. [I’ve been trying to get a pintuck blade that adds shape without thread. Finding the Holy Grail might prove an easier task.]

DSCF3447

The shoulder details aren’t pintucks but a narrow top-stitching effect done with the 7G pintuck foot as a guide for the twin needle (because they’re stitched over the seam fabric the fabric pulls taut and needs help for definition such as cord, thread or blade).

DSCF3451

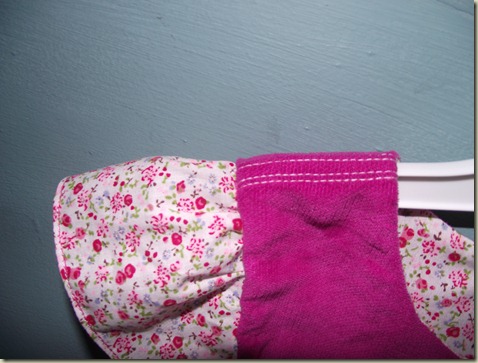
I kept the twin needle top-stitch theme going on the cuffs, hem and neckline which is also finished with bias tape in hot pink just peeping over the top.

DSCF3455  DSCF3457

The hem is double rolled using the hemming foot included with my machine.  I discovered the hard way that it couldn’t cope with double hemming over the seams by smashing two needles. I ended up doing those sections by hand then top-stitching them on the machine to look consistent.

DSCF3499

And talking of seams, I pretty much made this dress back to front. Not in the “oh no, where’s the seam ripper?” sense but in that I first finished off all the edges of the pieces with the overcast foot on my machine before sewing them together(yup, just couldn’t be bothered to thread up the serger).  Its not as neat as serging, but it looks cute all the same and reminded me of dainty hankies.

DSCF3508

In the photo you can just make out the zigzag stitches on the hem where I hand-basted them then top-stitched over the hem with pink thread on the machine.

Instead of fastening the blouse with buttons, I opted for snaps.  This was for two reasons, the first that I couldn’t find any buttons that suited it and secondly because I was already thinking snaps would make life a bit easier.  I find buttons on children’s clothing quite frustrating.  Most days I struggle to get a top onto Miss Mango, never mind try to do up the buttons while madam wriggles around and tries to escape. Snaps just seem so much easier.  If I find good buttons I might add some mock ones onto the back.

DSCF3453

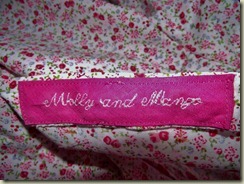
And to finish off, a Molly and Mango label, this time on bias binding. I wasn’t going to make one for the blouse, didn’t feel like it needed one but I talked myself into it:

DSCF3485

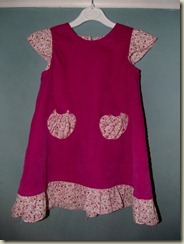
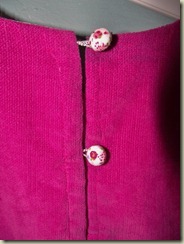
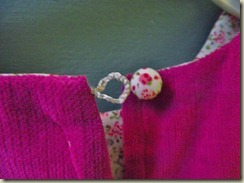
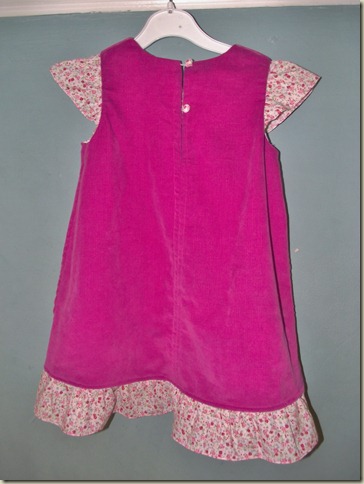
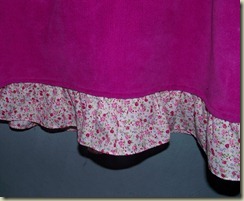
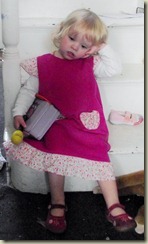
The pinafore dress is hot pink needlecord (from someone’s stash clear-out on eBay) and the ruffle details are in the same fabric as the blouse as is the self-covered buttons (yes, I did use buttons this time).

I echoed the narrow stripe top-stitching on the shoulders only.

DSCF3463

The self-fabric buttons are fastened with thread loops.  Do modern patterns still use these?  I love the fact that the instructions give no aid at all to how thread loops are made, they just expect you to know. But they are easy-peasy and quite therapeutic too, reminds me of the cat’s cradle type games I played as a kid.  I could sit for hours making long chains of these, maybe I need to take up crochet! 

DSCF3470  DSCF3481

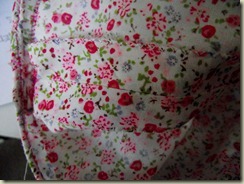
I felt inspired to break up the sea of hot-pink with more detailing in the form of pockets.  I made these from the pattern piece used for the sleeve ruffles.  I used a rolled hem on the whole piece.  I ended up hating these pockets and I still don’t like them now, thoroughly put off trying them again!

My intention was to sew elastic thread along the top to make the gathered opening stretchy but after turning the sewing room upside down, I cannot find my elastic thread.  In the end, I made a casing for narrow elastic which works fine but then I had a helluva time trying to get them look symmetrical.

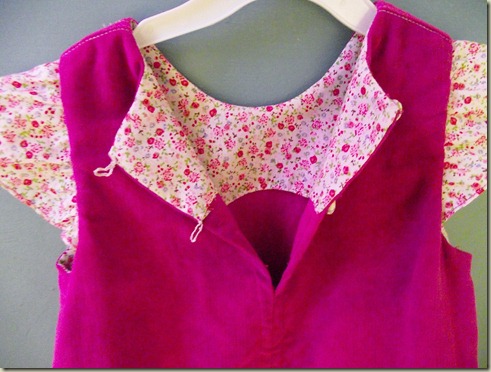
The facing is also in floral fabric (I love pretty contrast facings).  I did not manage to sew the sleeve ruffles into the facing section. Okay I did, but it was because I was stewing over why the instructions said to sew the facing at the neck only, press in 5/8 around the shoulders and sides then flip to wrong side of fabric and hand slipstitch the facing in place around shoulders and sides. Sounds like a lot of unnecessary work and I proved that by machine stitching the facing down then pulling the back pieces through under the facing to flip the garment right side out. Worked perfectly fine. (Except for sewing the sleeve ruffles into the facing…).

DSCF3482

I love the sleeve ruffles, such a cute vintage detail, almost every girl’s pattern from the 40s and 50s seem to offer it as an option as well being popular well into the 70s. It often makes an attractive detail on ladies’ patterns of the 40s but I’m not quite sure that is a look a grown woman could pull-off? What do you think? Would you?

DSCF3465

I didn’t enjoy sewing the ruffle trim either. Gathering and ruffling is my sewing nemesis. I’d happily sew in a hundred zips of any variety and do another 100 buttonholes than gather or ruffle, I’ve decided!  I’ve had no success with the monster ruffling foot and the gathering foot has failed to impress me. I guess I must battle on though as they make a great detail. 

DSCF3461

The verdict?  While Miss Mango said “Oooooooooh! Wowwwww!” (Not the most verbose two-year old I know, probably a good thing!). She immediately insisted on wearing the blouse, despite it being almost bedtime and wore it for two days in a row, its gone for its inaugural wash now, covered in yoghurt, orange juice and whatever else two-year old’s roll in! The pinafore dress is made of sturdy stuff and successfully survived its first wearing too!

DSCF3491   DSCF3512

Its heartening to see her like these so much, she flat out refuses to wear the uber-cute pink and white dungarees I made her [which are now pink and pink after my mum did some laundering for me…. Disappointed smile ] and another pair of trousers I made earlier in the year. Its actually really hurtful when a toddler throws a hissy fit because she does.not.want.to.wear.what.you.made.for.her!  Just wait until you’re old enough to understand emotional blackmail, Mango!